Summary
- Introduction
- I’m not fake, please let me in!
- Fighting invisible demons
- The final fight
- Conclusion
- References
Introduction
A long time ago, I was looking for vulnerabilities in a Brazilian bank through a Bug Bounty platform. During that phase, I managed to report quite a few issues to them and earned a good amount of money. However, that platform was shut down, and I ended up stopping my tests on their systems.
Recently, while browsing HackerOne, I noticed that the same bank is now there, but as a VDP this time. I decided not to test their web applications this time but instead focus on their mobile apps. Looking at the available options, I chose one of the apps that didn’t have many reports and seemed interesting to test.
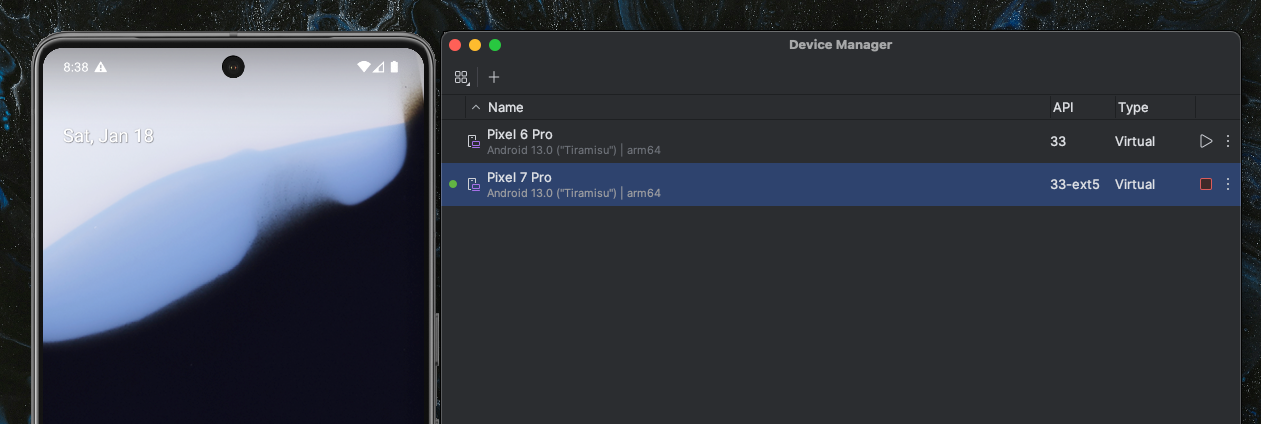
I already have a ready environment. In this case, I’m emulating a Pixel 7 Pro using Android Studio, and it’s rooted with the help of rootAVD and Magisk, which I believe is the easiest way to have an emulated Android device with the necessary permissions.
rootAVD is a project developed by “newbit,” aimed at enabling us to root our Android Studio Virtual Device (AVD) using Magisk. It achieves this through a shell or batch script, which makes our lives much easier.
Magisk is software developed by “topjohnwu” and various other contributors with the goal of allowing customization of Android devices starting from version 6.0. Magisk includes several modules, such as MagiskSU, probably the most famous, which provides root privileges to applications, Magisk Modules, which allows the use of custom modules within Magisk itself, and others.
I also use the plugin MagiskTrustUserCerts by NVISOSecurity, which allowed me to install the Burp Suite certificate as an authority, avoiding issues when using Burp Suite to intercept application requests. The only concern would be dealing with SSL Pinning. We’re not using it at the moment, but it’s worth documenting.
I recommend installing Android 13.0 with Google APIs so you can access the Play Store and download the apps directly from there. This ensures you have the most up-to-date version, likely free of malware, and functioning as expected. I even tried looking for the same app on sites like APKPure or APKCombo, but I wasn’t successful. Apparently, it hasn’t been listed or uploaded there yet.

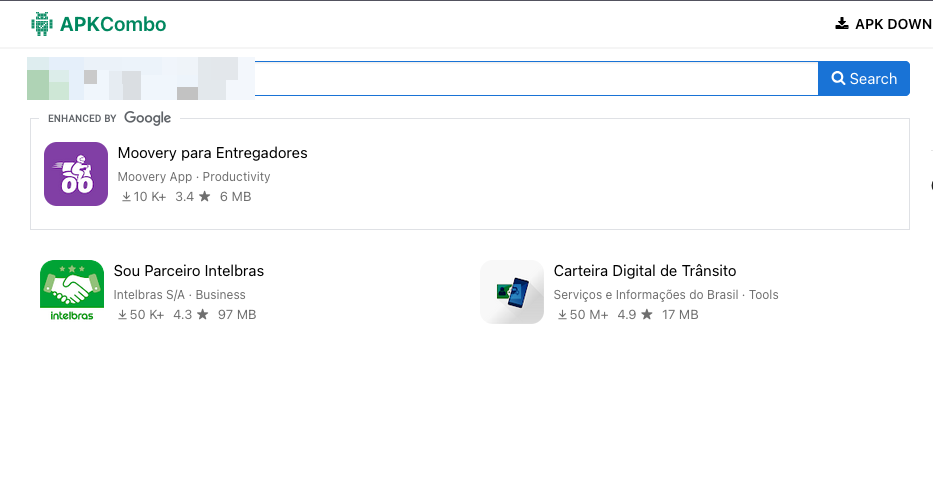
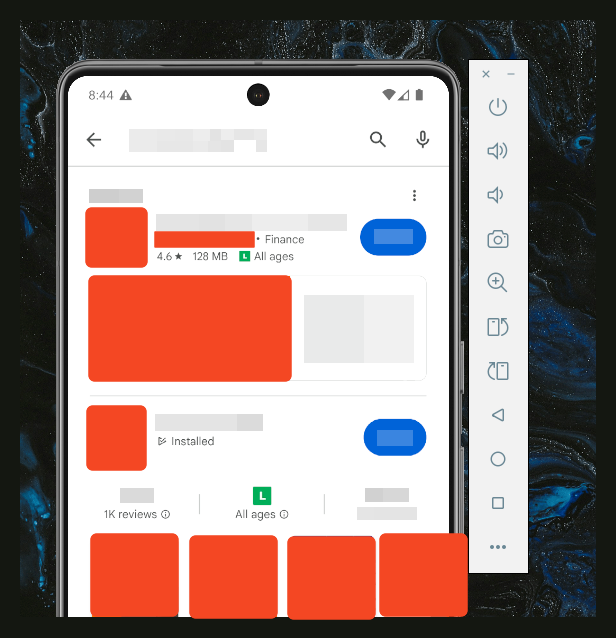
None of these apps are our target. So, with one of my Google accounts connected to my emulated Android, I can download the app directly from the Play Store and proceed with the rest.
After installing the application, I go to my terminal and extract the original APK using adb, in a very simple and practical way, so I can perform some static analyses such as information gathering and reverse engineering using Jadx. I like to use Frida to get the correct package name and use it to identify the correct APK path.
Android Debug Bridge, or (adb), is a tool that allows debugging Android devices. Through it, I can interact with the AVD we created in Android Studio.
Jadx, on the other hand, is another tool that enables the decompilation of Android Dex files and APK files, which is very important since our target is precisely an Android application.
Finally, the mighty Frida is a toolkit designed for developers, reverse engineers, and security researchers, aimed at enabling dynamic instrumentation of applications.
Below, I used the command frida-ps -Uai to list the applications installed on my AVD. The goal was to capture the full package name of the application.
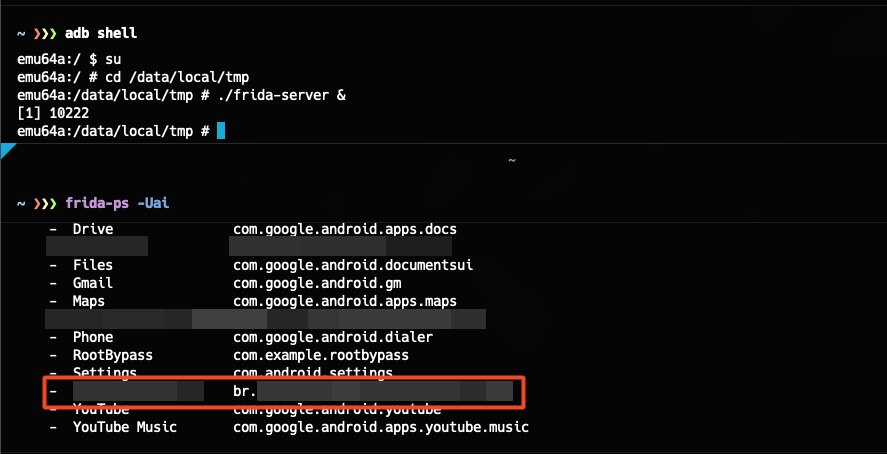
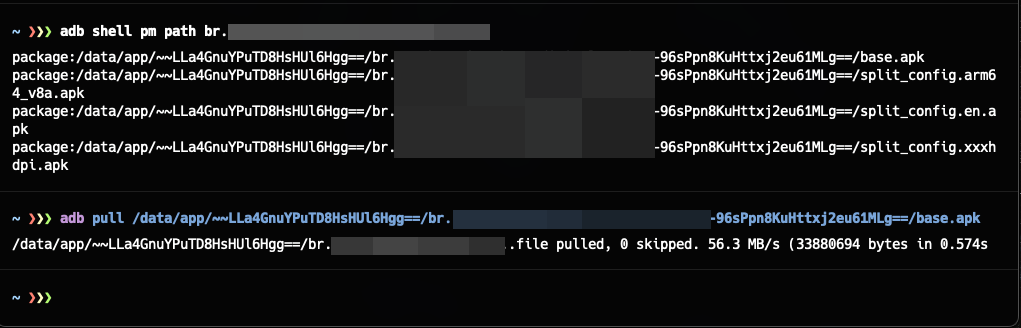
To capture the full path of the application, I use the command adb shell pm path <package name>, then I use adb pull <path> to extract the APK to my local machine.
The first thing I like to do is use a set of tools to assist in the process of finding vulnerabilities in the target application. The ones I use the most are:
- apkleaks: This tool returns various information about the APK, including possible hardcoded secrets, links, strings, and other elements.
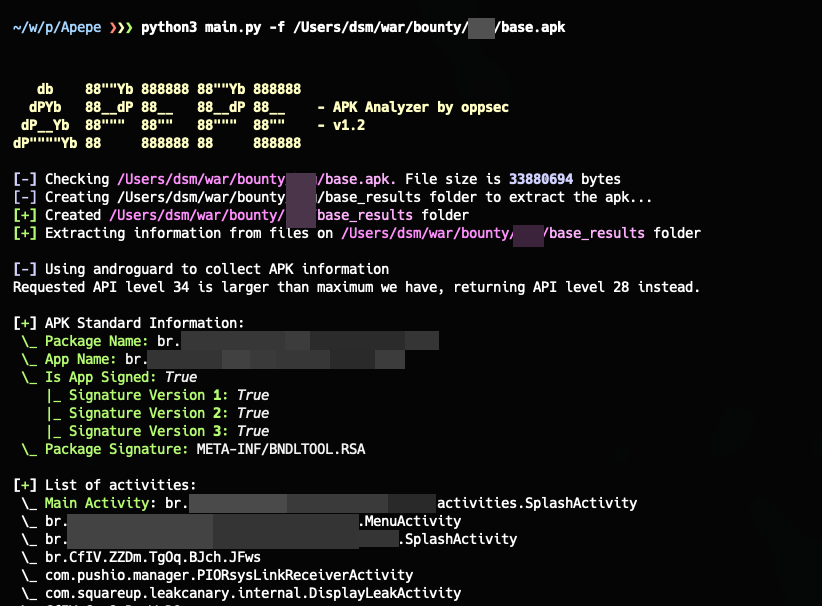
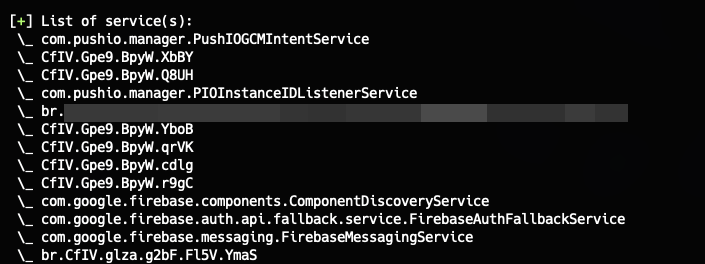
- Apepe: A project of mine that lists various interesting details, such as all activities (including the app’s main activity), requested permissions, utilized libraries, and a list of services it uses or consumes. It also attempts to guess the app’s programming language based on the extracted content, though it’s not very precise.
I was happy to use my project on this target app because it helped me identify a bug in the tool, which I was fortunately able to fix easily. The issue was with retrieving the app_name from the Androguard library.
With all this data collected, I proceed to use Jadx to read the application’s source code and begin identifying vulnerabilities. I examine key files, such as the AndroidManifest.xml, to look for intents, content providers, and so on. However, skipping over this step for now, I like to search for onResume() functions to examine the main initializers of the application. This revealed something very important:
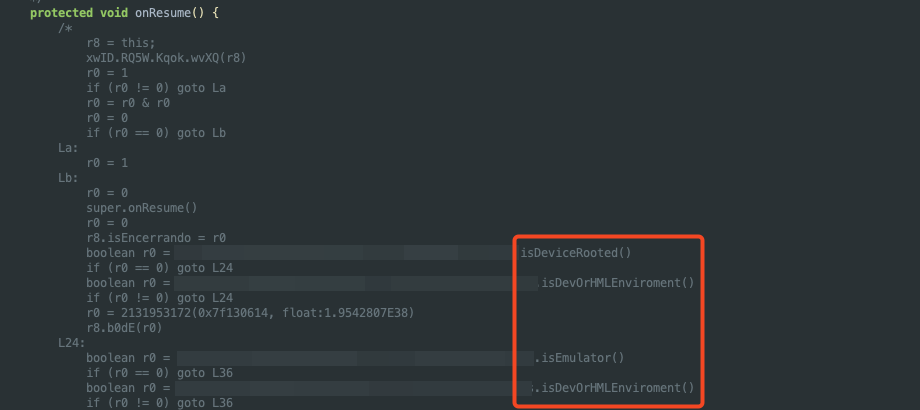
As we can see, there are functions in the app that check if the device is rooted, if it is running in a development or staging environment, and if it is an emulator.
I’m not fake, please let me in!
Let’s start with the isDeviceRooted() function, which is declared in a class called RootUtil. Within the same class, there are three functions that check whether the device is rooted in different ways. The first one is checkRootMethod1.
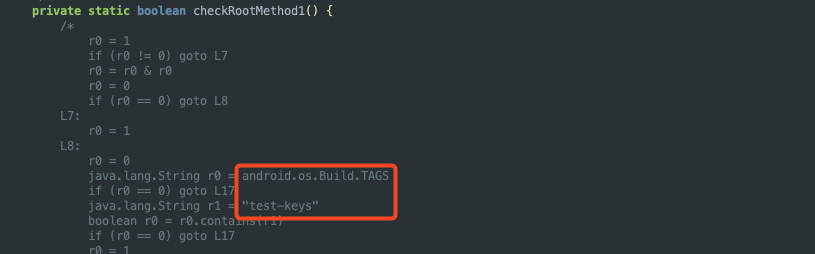
The first check captures the value of the TAGS property from android.os.Build and verifies if its value is test-keys. Another relevant point is that it’s a boolean function, so the final result will simply be true or false.
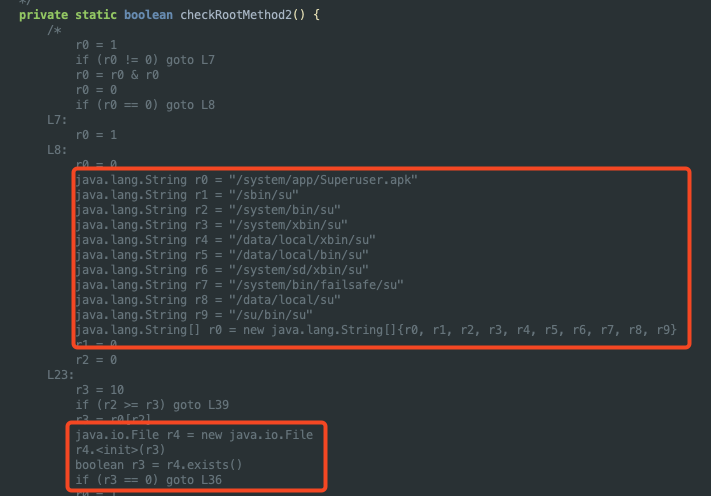
The function checkRootMethod2 creates an array with the standard paths of several SUID binaries and checks if the file exists using the java.io.File API and the exists() function. It’s worth noting that this is also a boolean function.
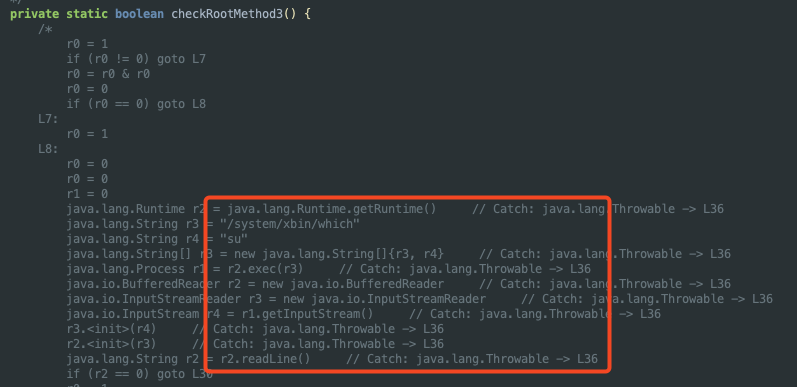
The last function, checkRootMethod3, executes the which command located at /system/xbin/which to check for any result pointing to the su binary by reading its output.
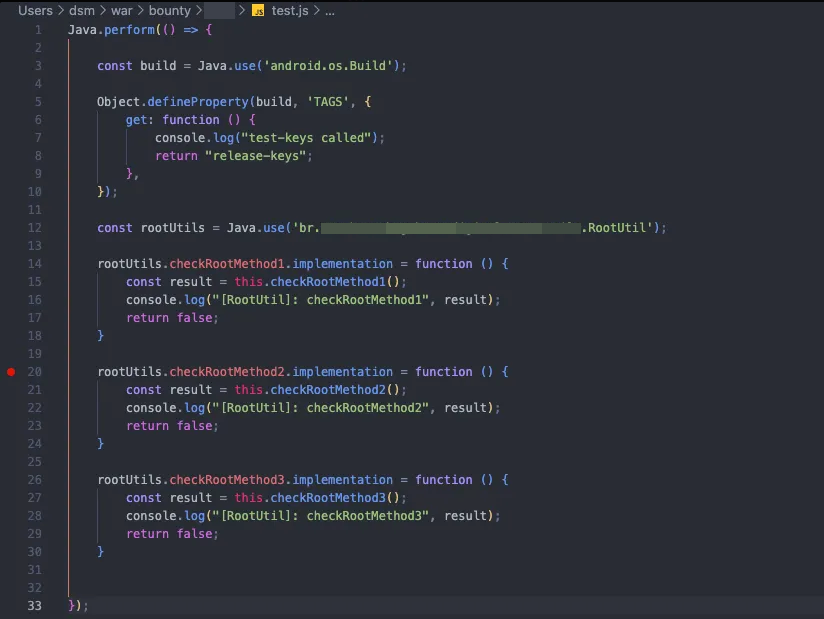
Since all these checks are in the RootUtil class, we can create a JavaScript script and use Frida to intercept these calls and return the value false for each of these functions. This way, the app will always get a response like, “No, the device is not rooted.”
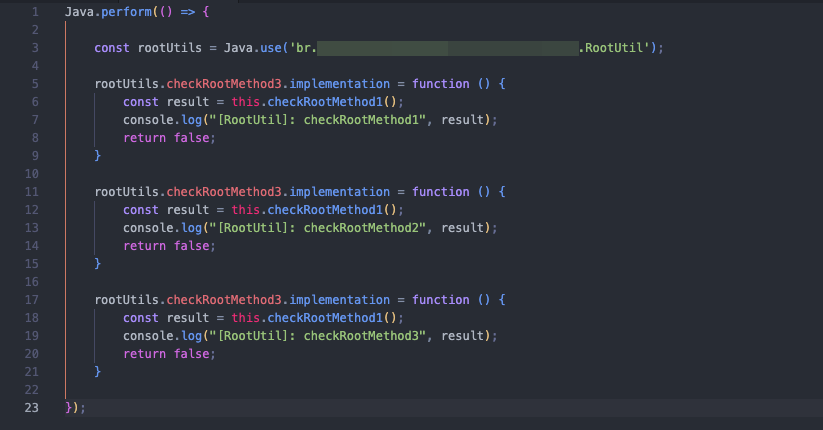
First, we define the class and then interact with each function, passing their names directly through the variable rootUtils that we previously defined. In the end, the key part for each item is simply the return false. It’s also a good idea to alter the TAGS property as a precaution, which can be done using the defineProperty function.
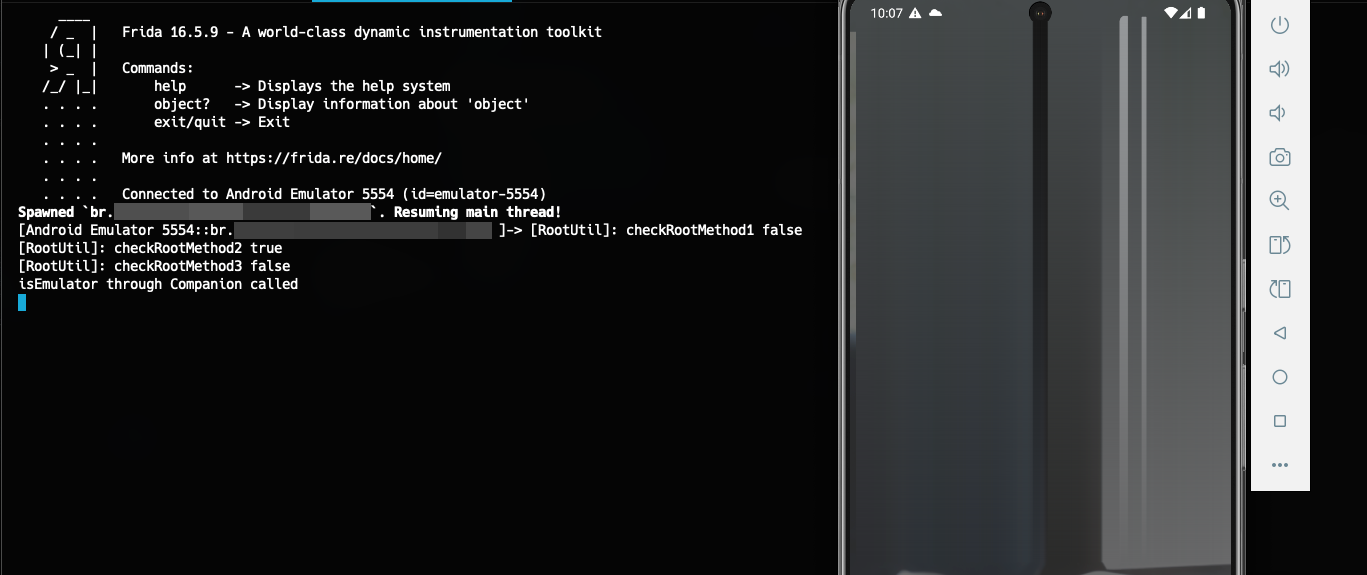
Now we just need to launch the app on our emulator using Frida, specifying its path with the -f argument and the JavaScript script we created earlier with the -l argument (don’t forget to start your Frida server).
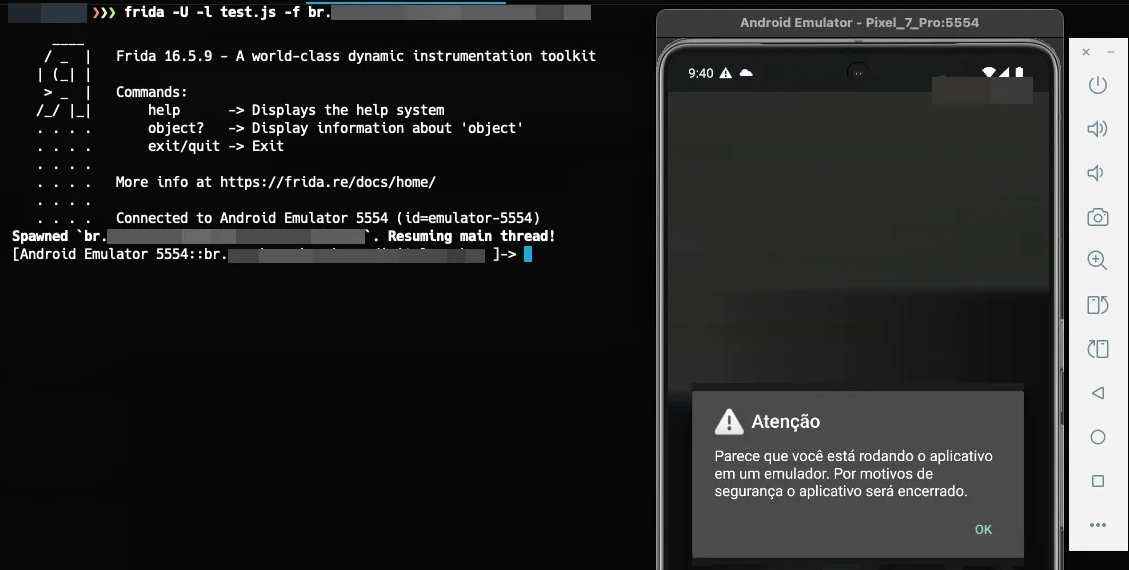
Strangely, we didn’t see any calls to the checkRootMethod functions, and the app already detected that we’re on an emulator. What’s my idea now? Bypass all protections at once and hope for the best xD. Currently, we have a possible bypass for the root check, so let’s apply the same process to the isEmulator and isDevOrHMLEnvironment functions.
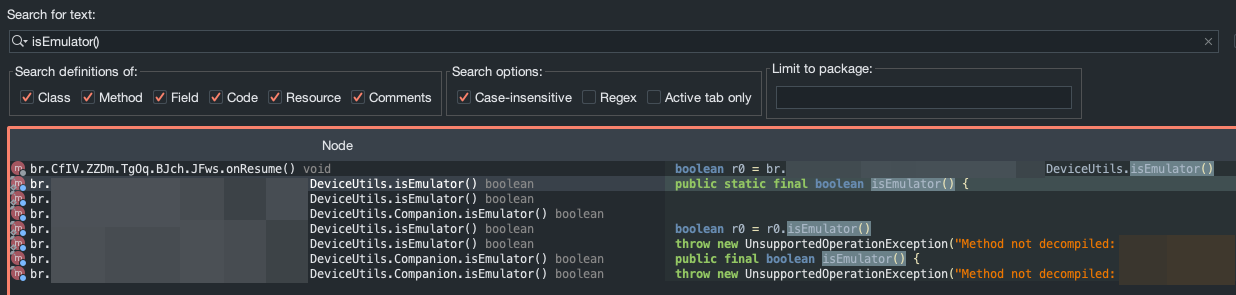
Using Jadx, I searched for the definition of the word isEmulator() and found something interesting. As shown in the image below, the isEmulator() function is defined in both DeviceUtils.isEmulator() and DeviceUtils.Companion.isEmulator().
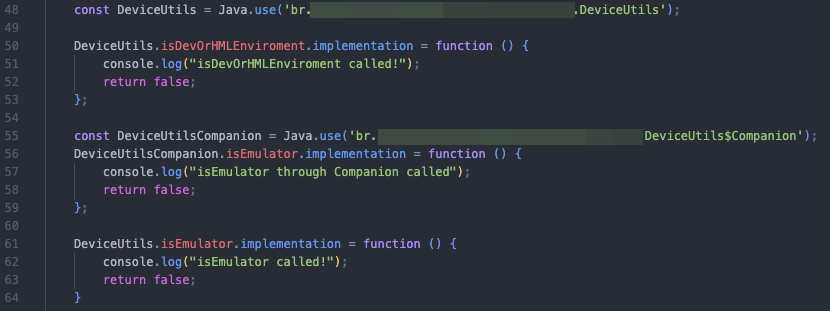
Again, these are boolean functions, so we’ll just return false for both and analyze how the application behaves now. The code looks like this:
With this, we’ll call our script again via Frida and observe how the application interacts now.
Now, the app no longer immediately detects us as being on an emulator. However, we still have an issue: after a short time, a notification appears at the bottom of the app indicating that something malicious has been detected on our device, and the app will shut down.
Fighting invisible demons
What are they detecting now? We’ve already bypassed the checks for root, emulator, and development/staging environments, so what’s left?
My first idea was to monitor calls to other system properties, which is done through the System.getProperty function. So, let’s implement a function in our script to tell us what is being called and the values being sent.
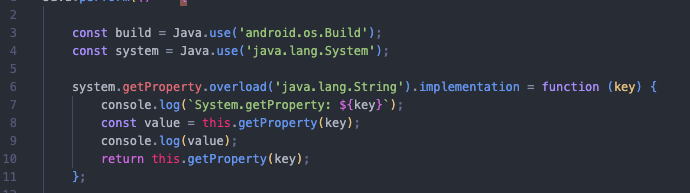
Note that I’m using the overload function because the System.getProperty method will likely be called multiple times with different parameters and so on.
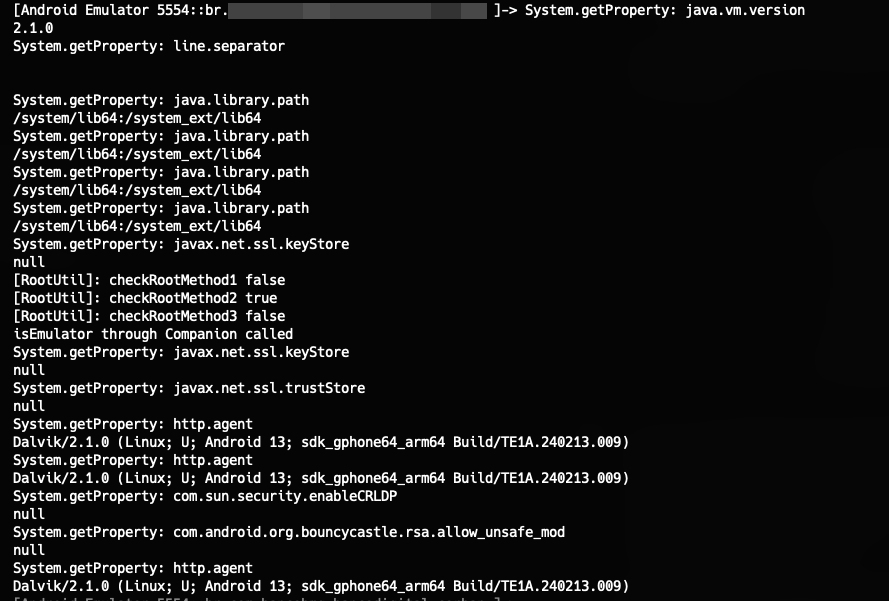
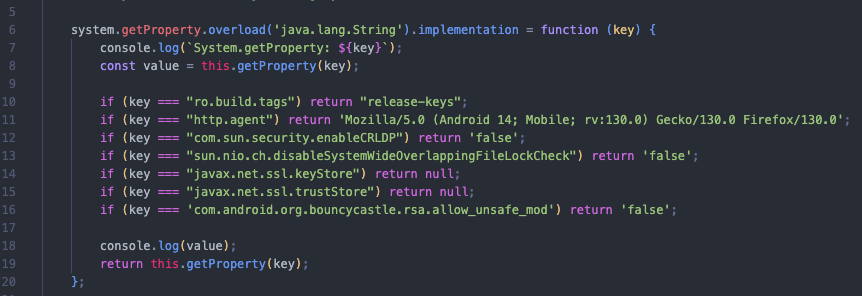
As we can see, several properties are being called, and some of them have unexpected values. One very important one is http.agent, which clearly indicates it’s an emulator. Therefore, we’ll modify the return value for these properties.
Even with all this configured, the app still closes. So, the issue doesn’t seem to be limited to property calls—there must be something else. Then, I got the idea to enumerate JSON objects, thinking that this information might be stored or sent to a server. I added the following code to my script:

Running the app again with Frida and our script, the result is as follows:

The app’s defense mechanism is detecting the presence of Magisk. The other reasons are likely also due to Magisk. In the censored section, the name of the solution protecting the app is displayed. So, now we need to bypass this solution!
Magisk offers a module in its settings to change the package name. Let’s change it to something considered “legitimate” xD. I chose “SpotifyManager,” but any other name will work too.
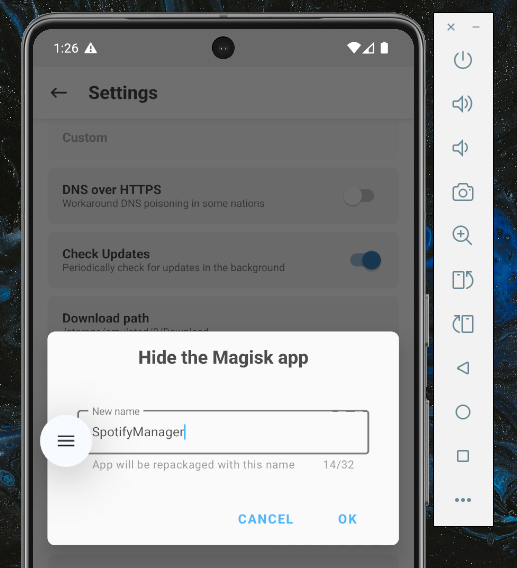
After this, Magisk will make the necessary changes, and we’ll need to confirm a few other things, though it’s unnecessary to detail them here. If we go back to our terminal and run the script again, we’ll see a surprise!

Magisk is no longer being detected by the package name, leaving only the options “Superuser exists” and “Superuser system app installed.”
To resolve this, it’s quite simple: we just need to install the “Shamiko” and “LSPosed” modules in Magisk, and everything will work fine. These modules can successfully evade detection.
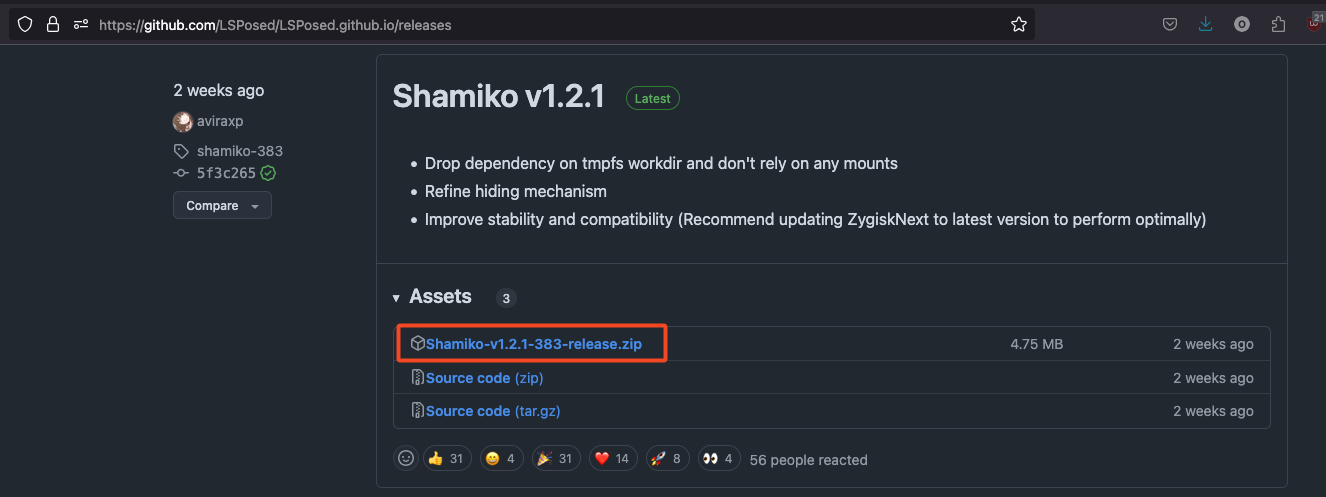
Shamiko is a module for Zygisk that hides the root process of Magisk, the Zygisk itself, and its modules, ensuring that protections cannot detect them through conventional means. For context, Zygisk is a Magisk module that allows us to run code in applications.
To install Shamiko, go to its creator’s GitHub page and download the zip file available in the GitHub Releases section.
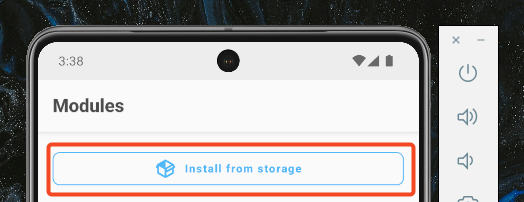
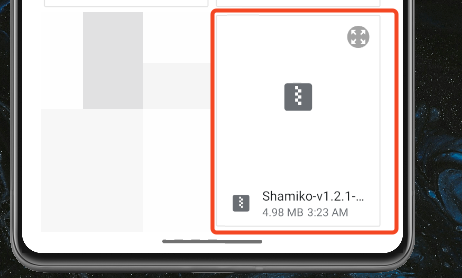
After downloading the zip file, move it to your sdcard with the command adb push <file> /sdcard and install it in Magisk. After installation, the “Restart” button will be available. Click it and wait for the AVD to reboot.
Once Shamiko is installed, let’s install LSPosed. LSPosed is a solution that allows us to modify the behavior of our Android device and system components in real-time. It’s available in another repository by the same creator. Download the zip, move it to your sdcard, and install it again. After installation, restart the emulator again.
With both installed, go to the Magisk settings and enable the “Enforce DenyList” option. I recommend restarting the emulator once more just to be sure. Then, navigate to the “Configure DenyList” option.
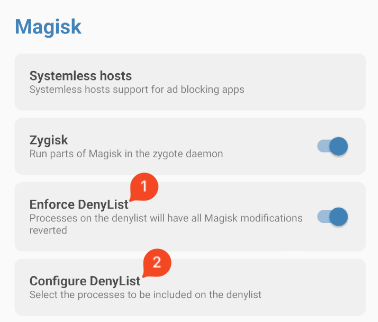
Now, find the target app and check its checkbox. This will enable the DenyList for the app we want.

With that done, if we run our previous script again, we can see that the reasonData no longer contains Sudo/Superuser information, but it still detects the environment as an emulator.

Now that we’ve hidden the root mode, let’s move on to the final step: figuring out how to convince the protection mechanism that we’re not an emulator.
The final fight
For quite some time, and with the help of some friends, we tried various ways to bypass the emulator detection—ranging from altering system properties to simulate a real device, to hooking some functions to understand what was actually happening behind the scenes. Unfortunately, we didn’t succeed until now.
The solution was to combine all the procedures we performed, the Frida script we developed, and a real device. In this case, I’d like to thank my friend thalysonz who conducted this test for me, as I don’t have a real Android device to test on. The result was that we could now run the application without being detected for the previously mentioned reasons, allowing us to proceed with any other tests we wanted to perform.
If, in the near future, we discover a way to bypass this emulator detection, I’ll update this article with the solution that made it possible.
Conclusion
In the end, it was an incredibly educational process. Since I don’t have much experience with mobile pentesting, dealing directly with a banking application that has several protections—though perhaps not as many as other banks—offered a real challenge throughout this process.
I hope you were able to learn something from this article or that it served as inspiration for you to continue your studies. Thank you very much!
References
- https://github.com/dwisiswant0/apkleaks
- https://github.com/oppsec/Apepe
- https://gitlab.com/newbit/rootAVD
- https://github.com/topjohnwu/Magisk
- https://8ksec.io/advanced-frida-mobile/
- https://labs.cognisys.group/posts/Writing-your-first-Frida-script-for-Android/
- https://github.com/skylot/jadx
- https://github.com/LSPosed/LSPosed